ETH pegged asset thanks to Bitswift
01 July 2020
Guide for using the BETH asset on the Ardor platform
Bitswift, one of the first companies that launched a child chain in Ardor back in 2018, has developed a solution to easily export the BETH asset (Asset ID: 12672395106465140536). It implies that the BETH asset can be traded using the asset exchange feature of the Ardor platform. Hence, thanks to Bitswift, the Ardor ecosystem is enriched with the possibility of trading tokens to Ethereum with a very high degree of decentralization, avoiding centralized exchanges, and costly fees.
Open an account in https://bitswift.cash/login. Afterward, you must provide a mobile phone number for being authenticated, and it is highly recommended to set up 2FA authentication. Once logged in, you can navigate to the "Holdings" page, which has several tokens plus Import, Export, and History buttons. Let's explain what means:
- Import: it refers to the action of transferring tokens from either ETH (Ethereum network) or BETH (Ardor) to the Bitswift web application. It is also commonly known as "Deposit" in other exchanges.
- Export: it refers to the action of transferring tokens from the Bitswifth web application to either ETH (Ethereum network) or BETH (Ardor). It is also commonly known as "Withdraw" in other exchanges.
- History: it shows all the import and exports executed with your Bitswift account for a determined token.
ETH to BETH asset
First, you should start getting familiar with the Ardor platform. As an introduction, you can follow the Getting Started of the official documentation and buy some tokens (Ignis, BITS).
Once you have an Ardor account, open the User Interface and populate the “Assets” section, click on the Asset Exchange and add the ETH asset id 12672395106465140536:
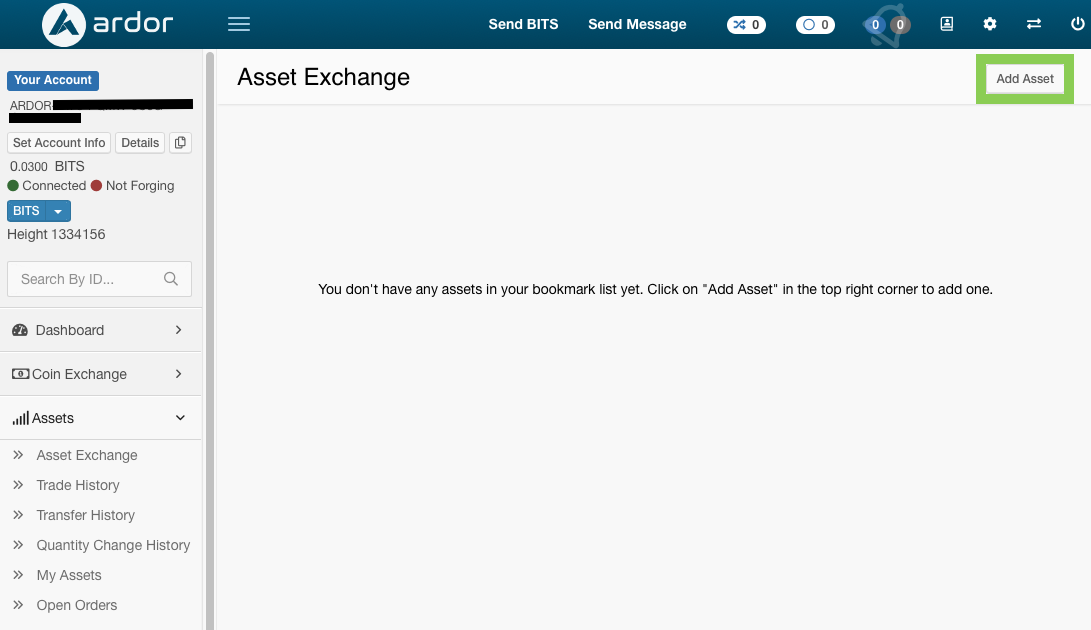
Screen 1: Asset Exchange
The BETH Asset will appear in the UI, available to be bought or sold, using the Ardor asset exchange

Screen 2: BETH Asset
Log in the Bitswift.cash and go to the holdings page. You will see an image similar as follows:
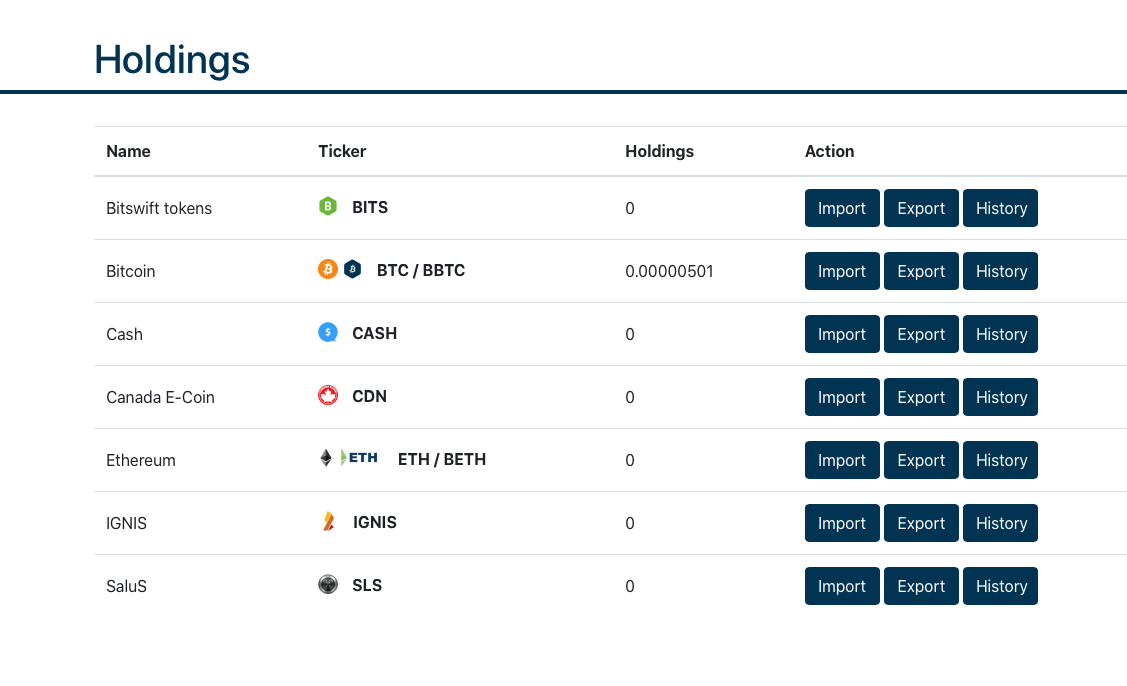
Screen 3: Bitswift.cash holdings page
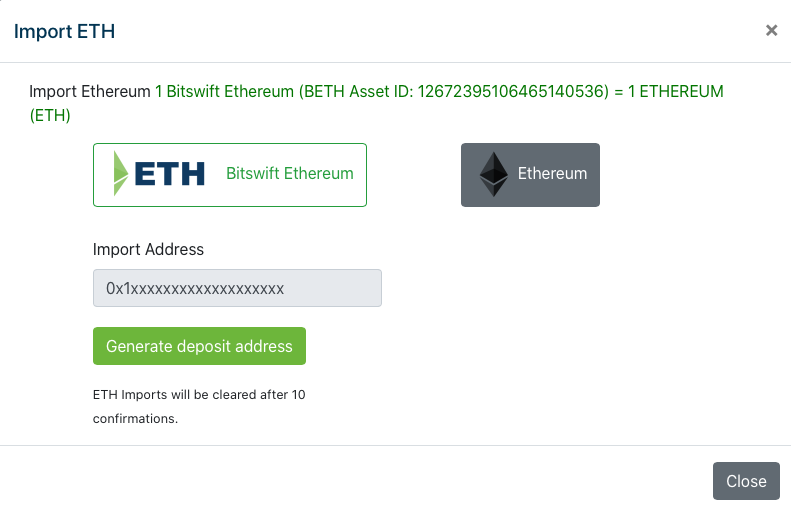
We have to generate an Ethereum import address by clicking on the import button:
Screen 4: Bitswift.cash holdings page
and then generate the deposit address:
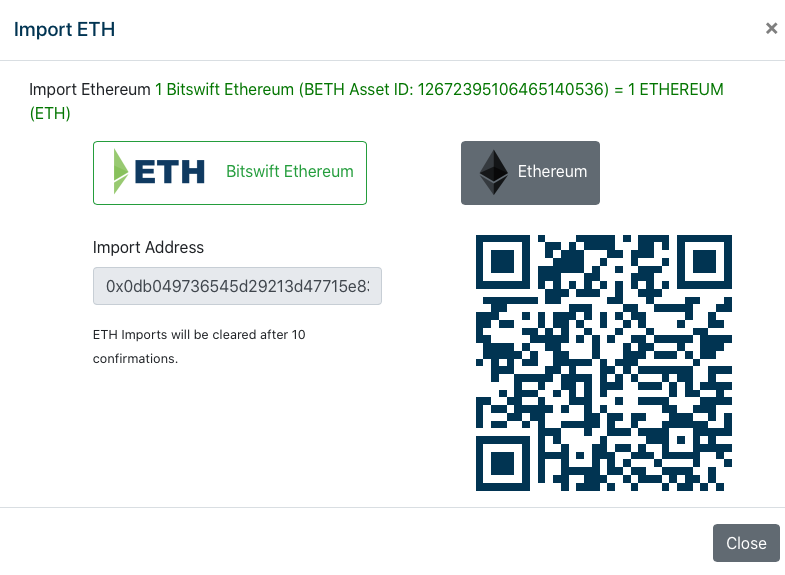
Screen 5: Bitswift.cash import ETH
We can send ETH tokens to the import address provided. In this case we have used the hardware wallet Ledger Nano to send the ETH tokens, it is also compatible with the Ardor wallet as well
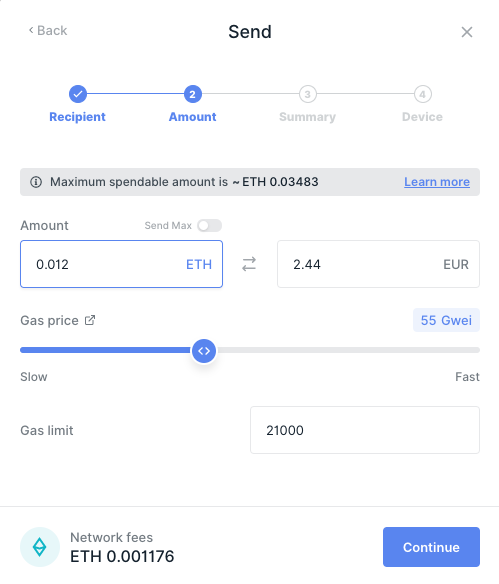
Screen 6: Ledger wallet Live, send ETH
After 10 confirmations it will appear in the holdings page:

Screen 7: Bitswift.cash, ETH/BETH holdings
At this point, we can send the ETH tokens to our Ardor account using the "Export" button:
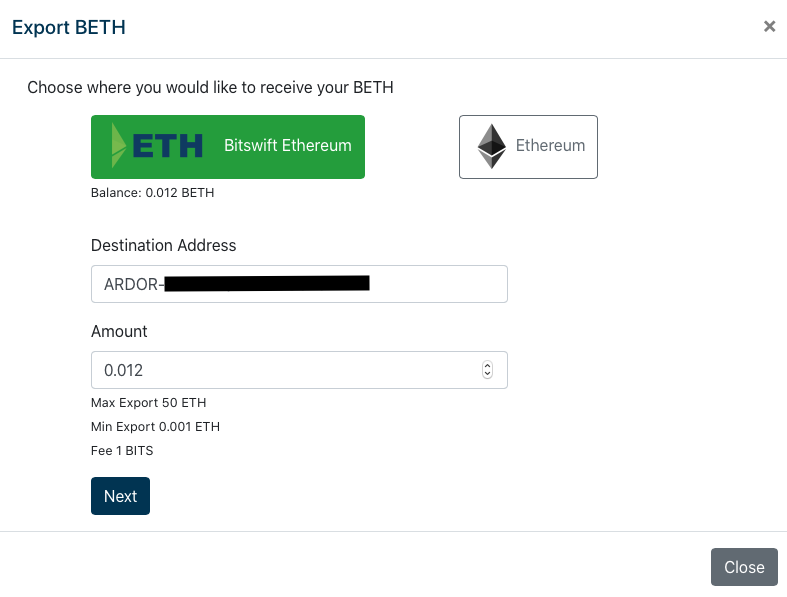
Screen 8: Bitswift.cash, Export BETH to Ardor
Click on next, and then you will get the confirmation modal. It is important to remind that this transaction requires a fee of 1.01 BITS that must be in the Bitswift app:
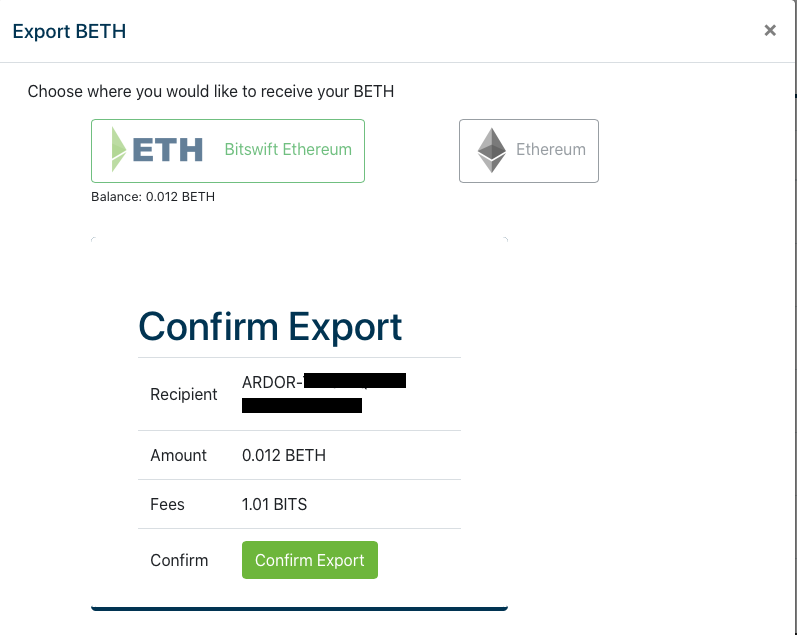
Screen 9: Bitswift.cash, Confirm Export BETH to Ardor
Confirming the export will show the exporting details:
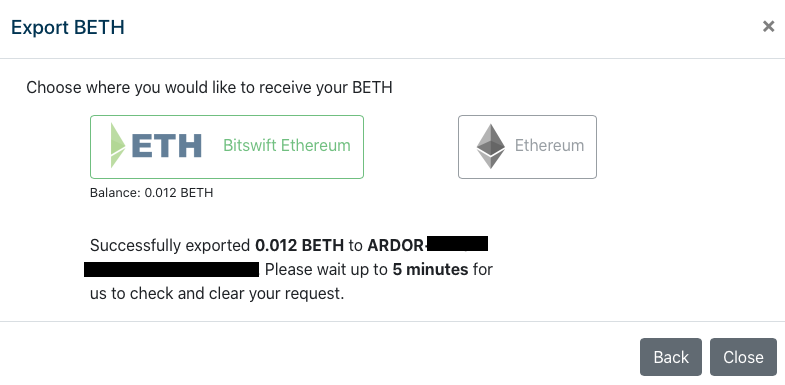
Screen 10: Bitswift.cash, Successfully Exported BETH to Ardor
After 5 minutes, we will have the BETH asset available:
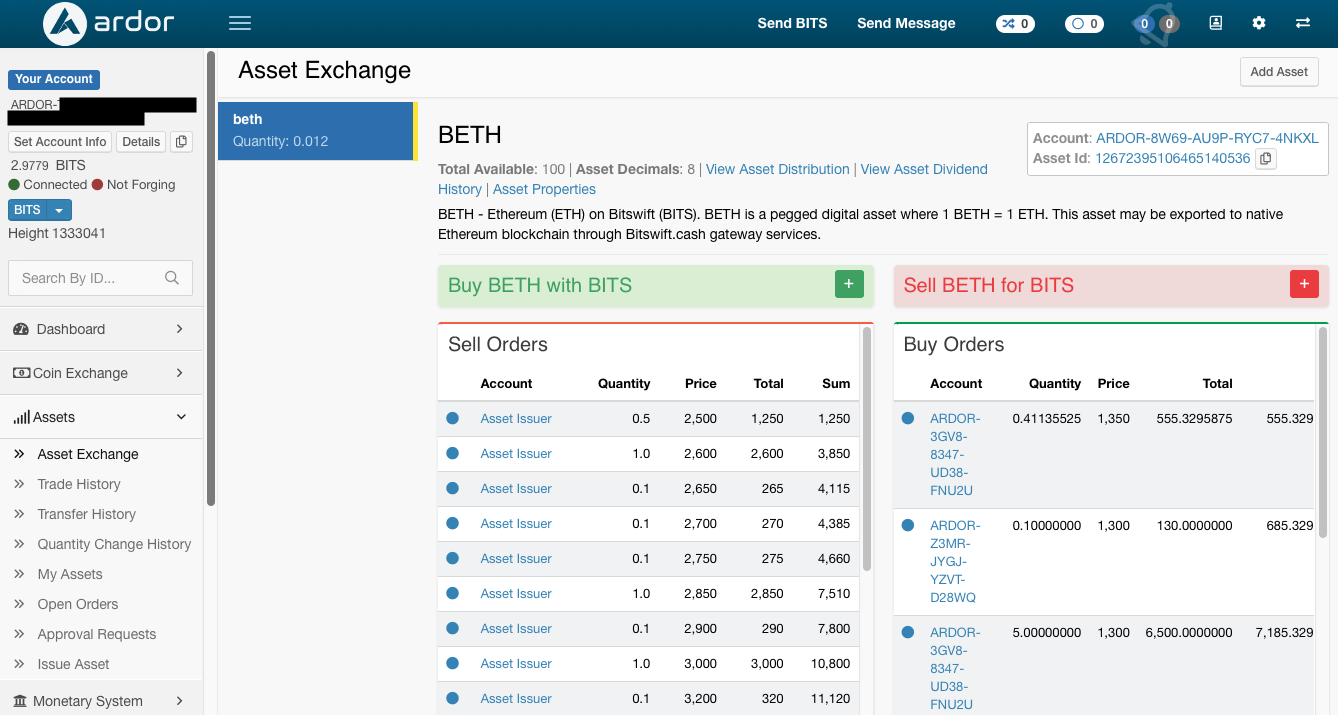
Screen 11: Asset Exchange, BETH buy/sell orders
As you can see, the BETH asset has a lot of trading activity on the BITS chain. Now that the BETH token is inside the Ardor ecosystem, you can trade it for any of the child chain coins that are available or transfer to other Ardor accounts.
BETH asset to ETH
It is also possible to convert BETH asset to ETH using Bitswift as well. In this example, we will send the 0.012 BETH back to its original address.
Open the Bitswift holdings page, click on import BETH and generate an Ardor import address as follows:
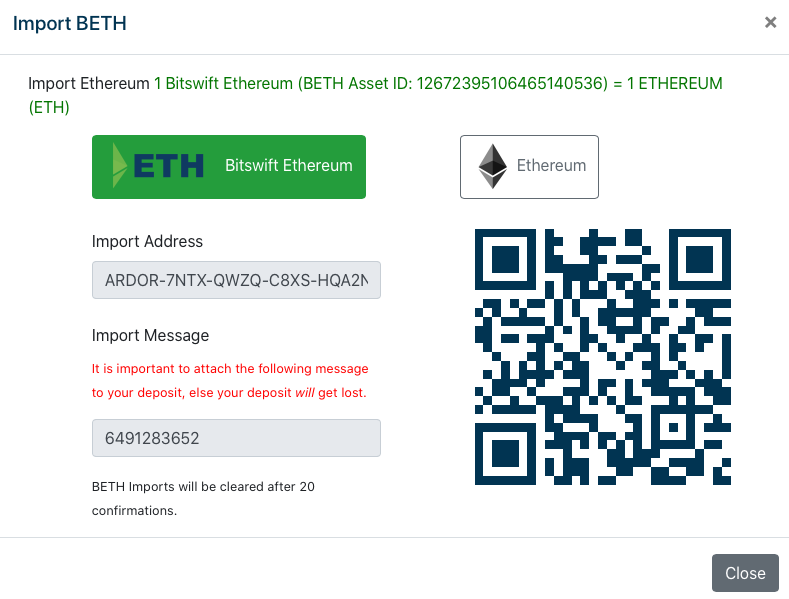
Screen 12: Bitswift.cash, import BETH
This is the address and the message that is required to be sent to transfer BETH assets to the bitswift.cash application. Next step, send the BETH assets from the Ardor user interface. Click on My Assets, and then click on the transfer button as shown in the following figure:

Screen 13: My Assets; BETH
Fill the transfer asset details and be aware of attaching the message shown in the bitswift web.
Shortly after 5 minutes, the BETH will be available in bitswitft.cash in the holdings page. Sending the tokens to an Ethereum address is straight-forward:
Click on the Export button. Fill the address and the amount. In this case, the fee is paid in ETH:
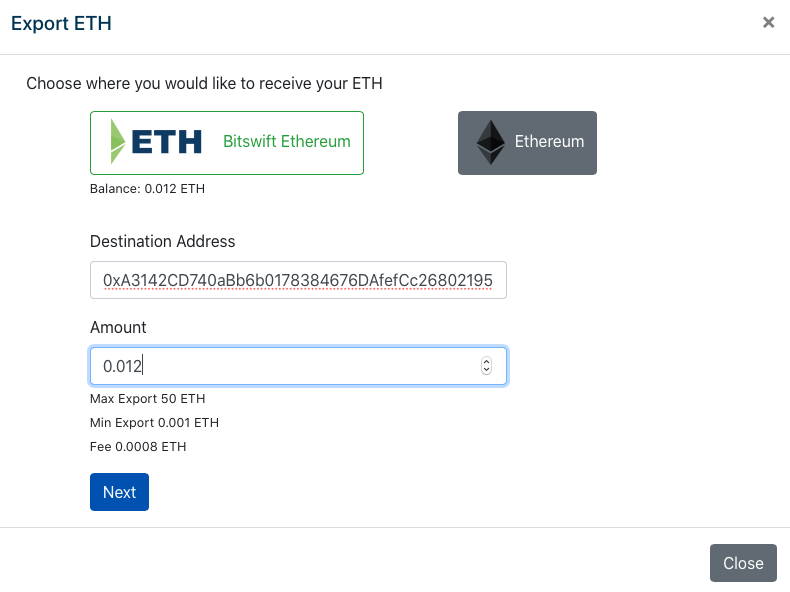
Screen 14: Bitswift.cash, export ETH
Click on next, and you will have the confirmation:
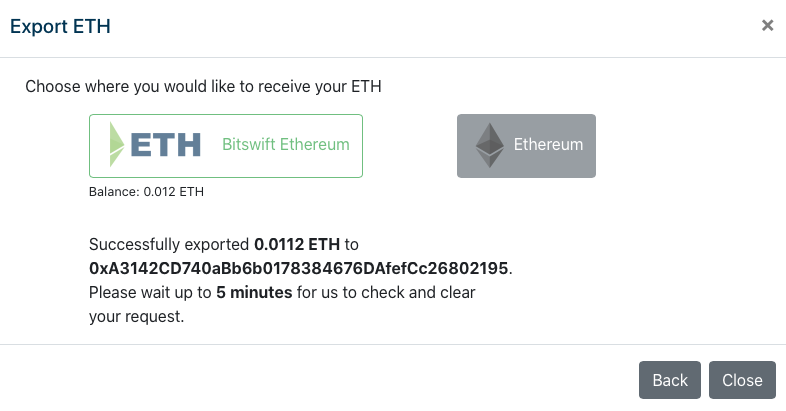
Screen 15: Bitswift.cash, successfully exported ETH
After 5 minutes, you will have the tokens in your Ethereum address.
If you are interested in reading more, there is a guide for using the BBTC asset on Ardor: https://medium.com/@almonte/btc-pegged-asset-thanks-to-bitswift-9f935e4b74c9